Nikita Tokarchuk

streaming vinyl records through a headless linux server

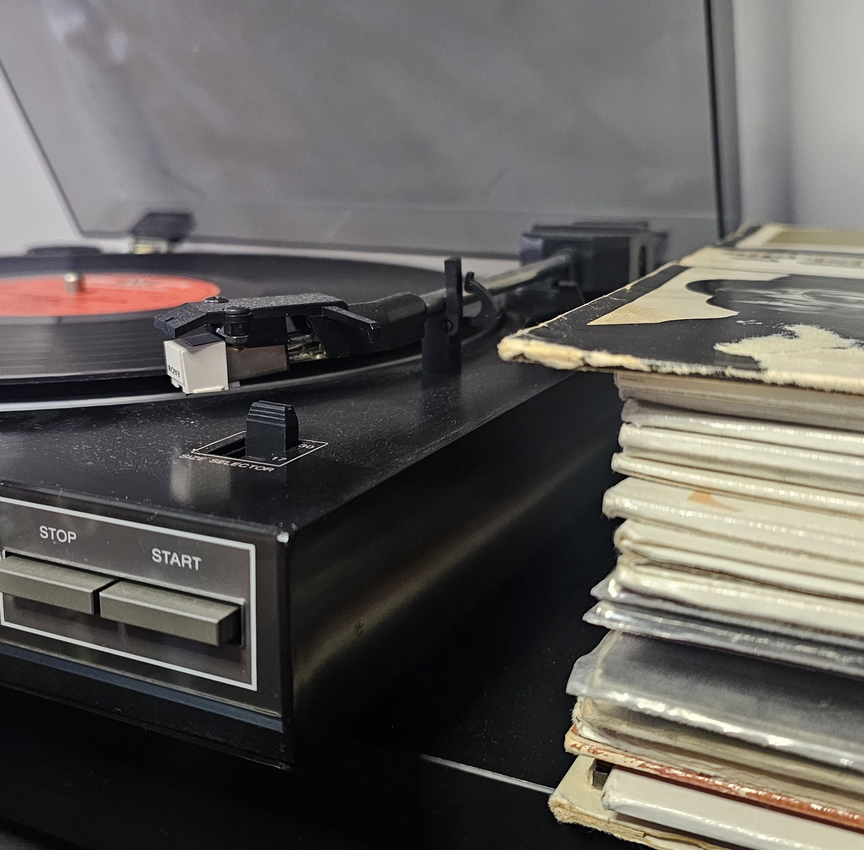
i used to connect my vinyl record player to a speaker manually when i want to listen records.
it was annoying and not practical to touch wires every time, so i decided to use my headless linux server that surprisignly stay nearby as a network audio bridge and listen records through my studio PC.

Screenshot 2026-03-14 093513.png

this article describes how i built an automated analog-to-network pipeline using pipewire, vban, and wireplumber.


hardware setup

the physical setup was straightforward. i connected the audio output of the record player to the line-in jack on the server’s motherboard.

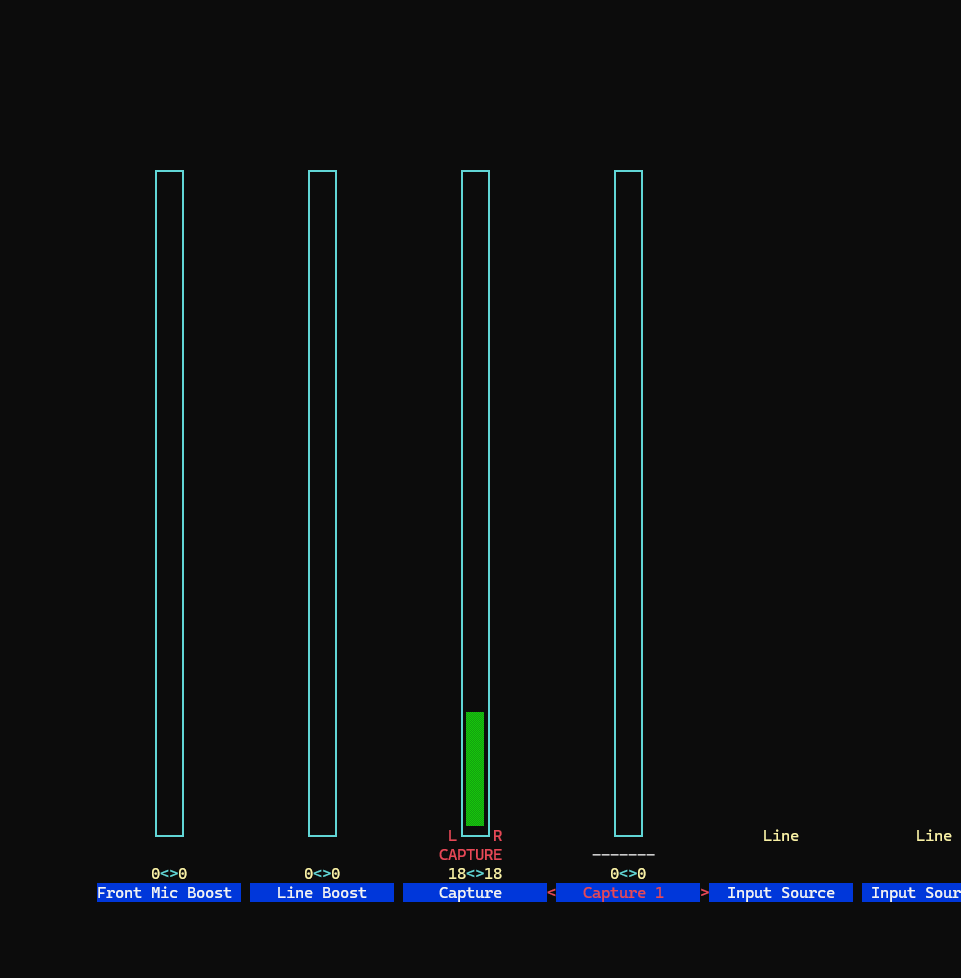
on the linux side i added my user to the audio group to allow access to the sound device and used alsamixer to unmute the capture channel and enable the line-in input.

at this point the server could capture audio from the record player.


phase 1: proof of concept

before automating the entire pipeline, i first confirmed that audio could be transmitted over the network with low latency.

for this experiment i used pipewire together with the vban network protocol.

i created the following configuration file:

~/.config/pipewire/pipewire.conf.d/vban-send.conf

this file loads the libpipewire-module-vban-send module and configures it to send audio packets to my windows pc on port 6980.

a minimal configuration looks like this:

context.modules = [
  { name = libpipewire-module-vban-send
    args = {
      destination.ip = "192.168.1.50"
      destination.port = 6980

      sess.name = "LineInStream"
      sess.media = "audio"

      audio.rate = 48000
      audio.channels = 2
      audio.format = "S16LE"
      audio.position = [ FL FR ]

      stream.props = {
        node.name = "vban-linein-send"
        node.description = "VBAN Line-In Sender"
        media.class = "Audio/Sink"
      }
    }
  }
]

this configuration creates a pipewire sink named vban-linein-send. any audio routed into this sink is transmitted as a vban stream.

to test the connection i played an audio file directly into the new sink:

pw-play --target=vban-linein-send test.wav

on my windows pc i opened voicemeeter banana, enabled the vban receiver, and configured it to listen for the stream named LineInStream.

Screenshot 2026-03-14 093802.png

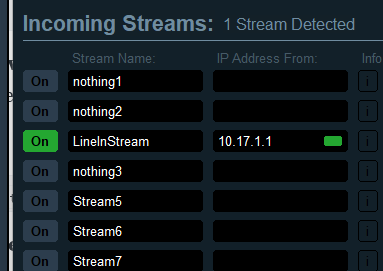
the test audio file played through the speakers immediately, confirming that the network connection worked. voicemeeter project is awesome, support them.


understanding the audio graph

pipewire represents audio routing as a graph of connected nodes. once the capture device and the vban sender are active, the signal path looks like this:

vinyl player
     │
     ▼
motherboard line-in
(alsa capture node)
     │
     ▼
pipewire audio graph
     │
     ▼
vban send node
(libpipewire-module-vban-send)
     │
     ▼
udp network stream (through a home network)
     │
     ▼
windows pc (voicemeeter vban receiver)
     │
     ▼
hi-fi speakers

the remaining task was to connect the capture node to the vban node automatically during startup.


phase 2: creating a persistent setup

the goal was to make the system operate automatically. if server reboots, it should capture audio from the line-in port and stream it to the windows machine without manual intervention.

first, i enabled systemd lingering so that pipewire and wireplumber could run without an active login session:

loginctl enable-linger your-username

next, i wrote a wireplumber lua script using objectmanager. the script detects the alsa capture ports and links them to the vban sender ports whenever both are present in the pipewire graph.

while implementing this persistent configuration i encountered two issues.


hurdle 1: line-in gain reset

during the first full test the audio sounded distorted.

the cause was the default line-in gain configured by the motherboard codec. the capture boost was too high for the signal coming from the record player.

lowering the gain in alsamixer removed the distortion. however, after each reboot the gain returned to its original value.

Screenshot 2026-03-14 093137.png

this happens because modern pipewire systems are managed by wireplumber, which applies its own mixer state during startup and overrides alsa settings.

the correct approach was to configure the volume through wireplumber.

first i located the capture device:

wpctl status

then i set the capture level:

wpctl set-volume 48 0.10

wireplumber stores this setting in its state database and reapplies it automatically after each restart.


hurdle 2: the script was not loaded

after solving the volume issue, i placed my lua script in:

~/.local/share/wireplumber/scripts/vban-autolink.lua

and created a configuration fragment:

~/.config/wireplumber/wireplumber.conf.d/99-vban-autolink.conf

this fragment instructs wireplumber to load the script during startup.

after rebooting the server the audio was still silent. investigation showed that the script was not being loaded.

the reason is related to wireplumber’s configuration hierarchy. if the file wireplumber.conf does not exist in the user configuration directory, wireplumber uses the system configuration in /usr/share/wireplumber and ignores user configuration fragments.

the solution was to copy the base configuration file:

cp /usr/share/wireplumber/wireplumber.conf ~/.config/wireplumber/wireplumber.conf

once this file existed in the user configuration directory, wireplumber detected the custom fragment and loaded the lua script correctly.


final result

after resolving these issues the system operates automatically.

when the server starts:

  1. pipewire launches in the background
  2. wireplumber restores the capture volume
  3. the vban module initializes
  4. the lua script links the line-in capture ports to the vban sender

from that moment the server continuously transmits the audio signal from the record player to the windows pc in my studio. in voicemeeter i can then route the incoming vinyl stream to any output device, such as the sound bar, the studio hi-fi speakers, or headphones.

how i fixed slow read speeds on my netac portable ssd

i bought a netac portable ssd (1tb) to use for backups. i use this drive with my linux computer and my samsung android phone, so i formatted it as exfat using the phone.

26-02-14 12-11-24 3002.jpg

at first, the drive was very fast. i could copy large files quickly on both devices.

but recently, the speed on linux became very slow. a 300gb backup file that i created months ago now took 3 days to read. the speed was not just slow; it was unstable. the read speed would start normally, then drop to 0 mb/s for several seconds, then start again, and then stop again. it kept freezing and restarting.

i thought the drive was broken, but the problem was actually how the software handles "garbage collection" on the drive. here is how i found the problem and fixed it.

the symptoms

26-02-14 12-12-13 3003.jpg

the drive (vendor id 0dd8, product id 2320) connected correctly, but reading files was very difficult.

  • before: fast reads and writes.
  • now: reading data (especially small blocks) was very slow.
  • the main problem: the speed would stop completely (0 mb/s) many times. the drive remained connected, but it paused working.
  • context: i used the drive with my android phone for months. android writes files correctly, but it does not clean up deleted files on external usb drives.

finding the problem

26-02-14 12-12-24 3004.jpg

1. testing the drive

i used a tool called f3probe to test the drive. this tool usually checks for fake drives, but it also measures speed. the results showed the problem:

average write time: 201µs (normal is ~1-10µs)
probe time: 14 minutes (should be less than 10 seconds)

the write time was 200 times slower than normal.

here is why: the ssd was full of "garbage" data. because i used it with my phone for months, i wrote and deleted many files. but android does not send a command called trim to external drives. trim tells the drive which data is deleted and can be erased. without trim, the drive thinks it is 100% full of valid data.

when i tried to read files on linux, the drive's internal controller had to search through all this old data. it became overloaded, paused all work to organize its memory (causing the drop to 0 mb/s), and then started again.

2. the solution: trim

to fix this, the computer must send the trim (or scsi unmap) command. this command cleans the drive.

i tried to run the trim command on linux:

sudo fstrim -v /mnt/usb
# fstrim: the discard operation is not supported

the error message said "not supported." the usb chip inside the netac enclosure was reporting incorrect information to linux. it said it could not do trim, even though the ssd inside could.

the fix: force the unmap command

i had to force linux to ignore the usb chip's report and send the trim command anyway.

step 1: force the setting

i found the device setting in the system files and changed it to unmap.

(note: replace /dev/sda with your correct device name)

# find the specific id for the disk
ls /sys/block/sda/device/scsi_disk/
# output example: 6:0:0:0

# force 'unmap' mode
echo "unmap" | sudo tee /sys/class/scsi_disk/6:0:0:0/provisioning_mode

then i ran the trim command again:

sudo fstrim -v /mnt/usb
# output: /mnt/usb: 931.4 gib trimmed

it worked! the drive accepted the command and instantly cleaned nearly 1tb of old data from my months of android usage.

step 2: make the fix permanent

the command above stops working when you restart the computer. to make it permanent, i added a rule file.

i created a file named /etc/udev/rules.d/50-netac-trim.rules with this content:

action=="add|change", attrs{idvendor}=="0dd8", attrs{idproduct}=="2320", subsystem=="scsi_disk", attr{provisioning_mode}="unmap"

finally, i reloaded the rules:

sudo udevadm control --reload-rules

the results

26-02-14 12-12-45 3006.jpg

after cleaning the drive, i tested the speed again.

measurement before fix (slow) after fix (fast) improvement
write latency 201 µs 1 µs 200x faster
test time 14m 03s 6.77s 125x faster

the "drop to zero" pauses stopped immediately. the drive reads data smoothly again.

conclusion

be careful about not trimming your ssd.
and for devices with custom provisioning_mode, note to:

  1. connect the drive to a linux pc occasionally.
  2. force the provisioning_mode to unmap if necessary.
  3. run sudo fstrim -v /mountpoint to refresh the drive.

other

while looking onto an ssd board i have found these pins, idk how can I use it but might be something useful for later

26-02-14 12-12-50 3007.jpg


hardware: netac portable ssd 1tb (usb id 0dd8:2320)
os: linux (kernel 6.x) & android (samsung)

quay docker image for linux/arm64

there is no official linux/arm64 quay image at the moment

Yes, quay is being built for linux/ppc64le in addition to a «default» linux/amd64 one.

ok, solution

I've started building a multiplatform quay docker image that supports both linux/amd64 and linux/arm64. Nothing custom but just an image. This https://do.cr.tokarch.uk/ runs natively on arm64 now.

So if you need one, pull it:

docker pull ghcr.io/mainnika/quay:v3.8.0

This is a place where builds are happening: https://github.com/mainnika/quay-docker/pkgs/container/quay.

how to create EFI-compatible rhel installation usb

pre

RedHat provides several ISO images that let you install a system. They are DD compatible and one can flash an ISO into USB drive by using either DD or Fedora Media Writer.

If you are lucky enough you may boot this USB in a BIOS-legacy mode, but not in the EFI mode. The installation also continues in BIOS-legacy and doesn't create any EFI-compatible partitions. No secure boot at all.

For those who care about UEFI in their system there are no structured information on RedHat docs.

see into an image

An official ISO has a both isolinux bootloader (bios-mode) and grub (efi-mode). The latter one disappear when you DD the image to USB drive. It may be just because of some misconfiguration during the ISO creating process. I tried to repack an ISO but had no luck about EFI mode.

efi-mode easy way

EFI boot was desinged to be very simple. There are no hidden magic stuff (almost) behind the bootloader. EFI-enabled partitions is just a VFAT-formatted partition with a custom PART-GUID. There are some limitations about the size and some others between different platforms, but let's keep it simple for now.
EFI partitions has type code EF00 and PART-GUID C12A7328-F81F-11D2-BA4B-00A0C93EC93B.

GPT fdisk (gdisk) version 1.0.9

Partition table scan:
  MBR: protective
  BSD: not present
  APM: not present
  GPT: present

Found valid GPT with protective MBR; using GPT.

Command (? for help): p
Disk disk.raw: 3104768 sectors, 1.5 GiB
Sector size (logical): 512 bytes
Disk identifier (GUID): 2A2619EB-3FA6-4C34-A716-1DCA94AD43B7
Partition table holds up to 128 entries
Main partition table begins at sector 2 and ends at sector 33
First usable sector is 34, last usable sector is 3104734
Partitions will be aligned on 2048-sector boundaries
Total free space is 4029 sectors (2.0 MiB)

Number  Start (sector)    End (sector)  Size       Code  Name
   1            2048         3102719   1.5 GiB     EF00  EFI system partition

Command (? for help): x

Expert command (? for help): i
Using 1
Partition GUID code: C12A7328-F81F-11D2-BA4B-00A0C93EC93B (EFI system partition)
Partition unique GUID: 2A1143B9-AFE9-48CE-8B47-21535F031770
First sector: 2048 (at 1024.0 KiB)
Last sector: 3102719 (at 1.5 GiB)
Partition size: 3100672 sectors (1.5 GiB)
Attribute flags: 0000000000000000
Partition name: 'EFI system partition'

gdisk util makes everything simple. To prepare an EFI-compatible partition you need to set the type to EF00 during the creating process, then PART-GUID will be filled automatically:

Command (? for help): n
Partition number (1-128, default 1):
First sector (34-3104734, default = 2048) or {+-}size{KMGTP}:
Last sector (2048-3104734, default = 3102719) or {+-}size{KMGTP}:
Current type is 8300 (Linux filesystem)
Hex code or GUID (L to show codes, Enter = 8300): ef00
Changed type of partition to 'EFI system partition'

almost it

Let's mount everything we need to make it work. First, locate an RedHat installation ISO, e.g. rhel-baseos-9.0-x86_64-boot.iso. Then locate a newly created EFI partition, e.g. /dev/sdc1.

$ realpath rhel-baseos-9.0-x86_64-boot.iso
/home/mainnika/rhel-baseos-9.0-x86_64-boot.iso
$ stat /dev/sdc1
  File: /dev/sdc1

EFI partition needs to be formatted first, please notice a label argument -n RHEL9. This is necessary for the bootloader to find a boot root partition by label.

# sudo mkfs.fat -F 32 -n RHEL9 /dev/sdc1
mkfs.fat 4.2 (2021-01-31)

Now mount everything. Be aware of ephemeral directory I use in exmaples, do not copy them blindly.

# mktemp -d --suffix=-iso-mount
/tmp/tmp.SR9TpfSV5U-iso-mount

# mktemp -d --suffix=-efi-mount
/tmp/tmp.A7IJSAwhHy-efi-mount

# mount -o loop /home/mainnika/rhel-baseos-9.0-x86_64-boot.iso /tmp/tmp.SR9TpfSV5U-iso-mount
mount: /tmp/tmp.SR9TpfSV5U-iso-mount: WARNING: source write-protected, mounted read-only.

# mount /dev/sdc1 /tmp/tmp.A7IJSAwhHy-efi-mount

# mount
/home/mainnika/rhel-baseos-9.0-x86_64-boot.iso on /tmp/tmp.SR9TpfSV5U-iso-mount type iso9660
/dev/sdc1 on /tmp/tmp.A7IJSAwhHy-efi-mount type vfat

Prepare/copy EFI bootloader. The EFI bootloader is just a EFI folder located in root.

# cp -r /tmp/tmp.SR9TpfSV5U-iso-mount/EFI /tmp/tmp.A7IJSAwhHy-efi-mount

For some weird reason there is an invalid bootloader in EFI folder, BOOTX64.EFI. Let's replace it with grub which is right there as well and remove some of leftovers.

# mv /tmp/tmp.A7IJSAwhHy-efi-mount/EFI/BOOT/grubx64.efi /tmp/tmp.A7IJSAwhHy-efi-mount/EFI/BOOT/BOOTX64.EFI
# rm /tmp/tmp.A7IJSAwhHy-efi-mount/EFI/BOOT/mmx64.efi

The most important step is to change a grub.cfg and let him use right paths and kernel. You might see here the label we've used during formatting.

# sed -i 's/RHEL-9-0-0-BaseOS-x86_64/RHEL9/g' /tmp/tmp.A7IJSAwhHy-efi-mount/EFI/BOOT/grub.cfg
# sed -i 's/images\/pxeboot/isolinux/g' /tmp/tmp.A7IJSAwhHy-efi-mount/EFI/BOOT/grub.cfg

The last step is to copy installation files from ISO media to EFI partition.

# cp -r /tmp/tmp.SR9TpfSV5U-iso-mount/{images,isolinux} /tmp/tmp.A7IJSAwhHy-efi-mount

that's it

Examine a filesystem tree for the EFI partition.

# tree /tmp/tmp.A7IJSAwhHy-efi-mount/
/tmp/tmp.A7IJSAwhHy-efi-mount/
├── EFI
│   └── BOOT
│       ├── BOOTX64.EFI
│       ├── fonts
│       │   └── unicode.pf2
│       └── grub.cfg
├── images
│   ├── efiboot.img
│   └── install.img
└── isolinux
    ├── boot.cat
    ├── boot.msg
    ├── grub.conf
    ├── initrd.img
    ├── isolinux.bin
    ├── isolinux.cfg
    ├── ldlinux.c32
    ├── libcom32.c32
    ├── libutil.c32
    ├── memtest
    ├── splash.png
    ├── vesamenu.c32
    └── vmlinuz

Unmount everything and eject USB drive,

# umount /tmp/tmp.SR9TpfSV5U-iso-mount /tmp/tmp.A7IJSAwhHy-efi-mount
# sync
# eject /dev/sdc

then boot it!

stream coding process to discord using OBS

Nowadays code streaming become more popular. There is even Twitch channel with software developing.

Usually for the streaming people use OBS software. Basically it allows you to combine several video/audio/etc sources into the one scene that is being streamed to the service.

Discord is another super popular app. The app let people be connected inside some community. For example the group of graphic illustrators can share their works and discuss in voice chats.

Discord live streaming is not very popular but sometimes can be increadibly useful. But Discord doesn't support custom streaming at the moment and the only choice you have is to stream window or entire screen.

a couple of tiny tricks

I use OBS Studio from the website https://obsproject.com. It is free and open-source!

Let's take a look!

image capture

First I move all controls into floating windows by using «windowed» button at the left of the control:

Now all your controls are separated and floating under the main window. You may want to adust its properties and size to fill the window with the scene:

That's all! The main OBS window can be a source for the discord live stream:

Go live!

sound

Using window source Discord takes sound from the window as well.
By enabling sound monitoring we make the window emit sound that will be captured.
The tricky part here is to avoid loops in the sound. But this part is hardly depends on your requirements and hardware.

As the simple solution to capture everything I can hardly recommend VB-Cable app that is basically a pipe source-sink. See https://vb-audio.com/Cable/ for details.